Skip to Main Content

3-Monitor Setup | A Step-by-Step Guide

Looking to perfect your triple monitor setup? Discover how to put together a three-monitor setup and organize your workstation.


Modern working and gaming setups require modern solutions. When it comes to maximizing the effectiveness of your tech, a three-monitor set-up is second to none.

Having three monitors can be a lot more productive and fun than being restricted to just one or even two. However, putting together a multi-monitor setup can have its challenges, and that’s why we’re here to help guide you through the process.

How Do You Set Up Three Monitors at Once?

Stringing three monitors on your desk is like getting ready to cook dinner; it’s all about the prep work. Cutting corners will likely result in jumbled wires, frustration, and a setup that may not look quite right.

Continue reading to finalize the screen setup you need.

Step One: Measure Your Desk

The very first thing to do is to make sure the monitors you have, or plan on getting, will actually fit on your desk. The two general most important measurements to find are the depth and length of your desk.

The third measurement is critical and often overlooked: Make sure that you have a rough idea as to where your tower or laptop will be resting. Measure from that point to where the nearest power outlet you’ll be using.

These measurements will inform the length of the different cords you will be using or if the cords you already have are too short. Nothing is more irritating than getting an entire desk set up just to find out that your cords are just barely too short of reaching the outlet.

If you have a standing desk, measure the distance from your desk to the outlet while in the sitting and standing position. You could accidentally have some of your things pulled off the desk if you do not compensate for when the desk is in its standing configuration.

Step Two: Install In-Desk Power

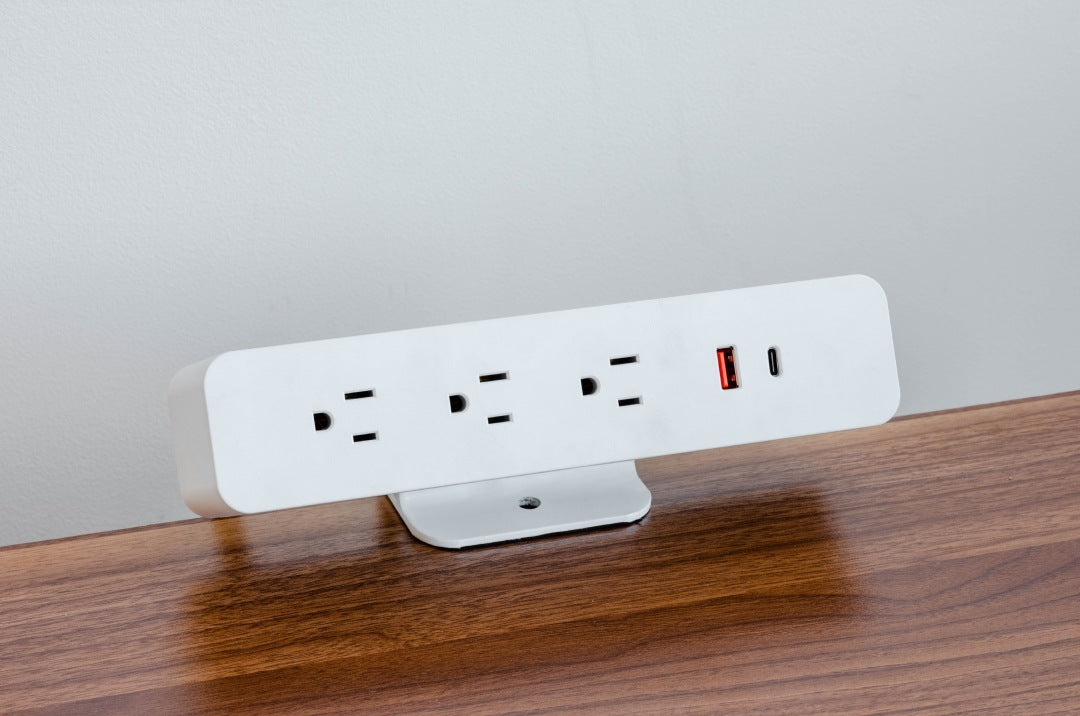
Having power strips installed directly onto your desk can seriously elevate your work or play experience; it allows for much easier access and can be far more aesthetically pleasing than just having cords strewn about.

One big decision you need to make is whether to have the outlets positioned on the top side of your desk, hidden below, or recessed and have access from the top position with a cover.

For those who want a completely hidden power source, install a power strip on the underside of your desk. How complicated this process can get depends on the materials your desk is made of.

Most power strips will have mounting holes on the back of them for easy installation. If your desk is made of wood, simply screw in the recommended size and length screws into the underside of the desk in the proper positions and mount the power strip.

For metal or any other material that you cannot screw into, there are suitable double-sided adhesives and mounting solutions. Try to use one that has velcro for easier application and removal.

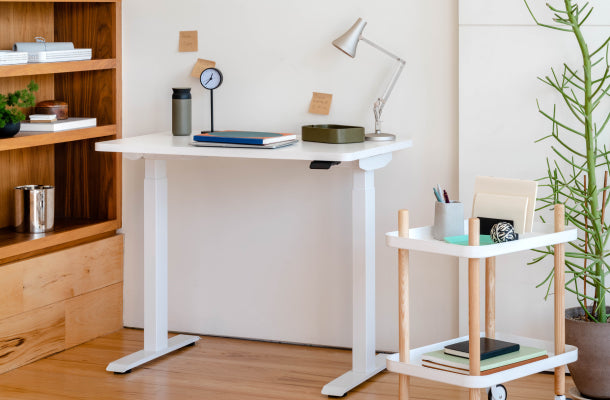
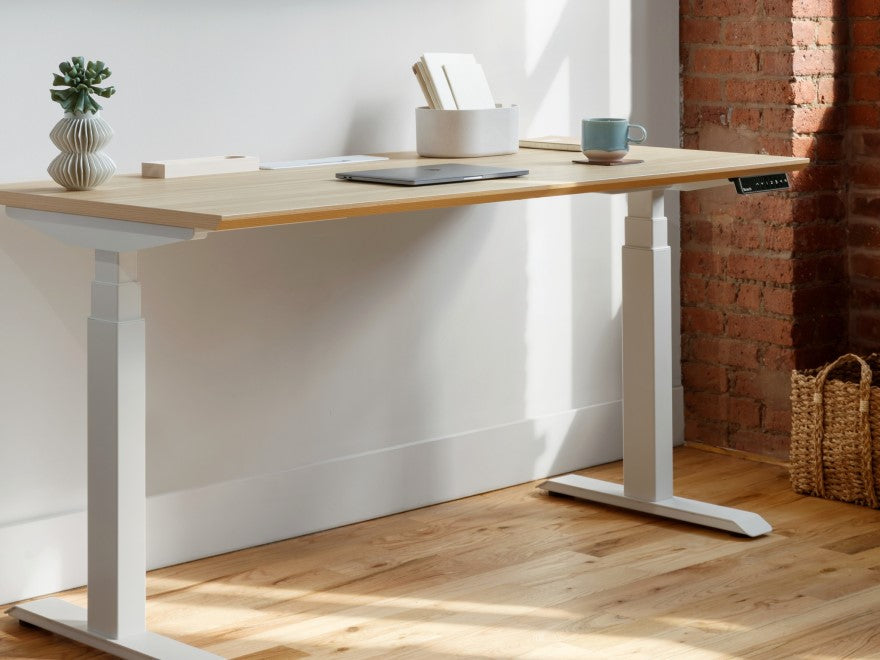
The recessed outlets are the best of both worlds and are found in Standing Desks. There’s virtually no installation required. All you have to do is put your power strip inside.

Step Three: Organize Your Power and HDMI Cables

Nobody wants to see a jumble of cables and power strips dangling behind and underneath their desk. There are a few easy things you can do to avoid this from happening.

If your power strip and HDMI cables are all the same color, mark them with different colors of electrical tape. For example, take one of your cords and wrap two small pieces of any color of electrical tape of your choosing at both ends of that cord.

This way, you won’t have problems guesstimating which cord you want to pull for maintenance or technical problems. Zip ties can also be handy in taming your cords and help with identification (if you get multi-colored packs of them).

The nice thing about plastic zip ties is that they are affordable and easily replaceable. You can usually buy them in the hundreds at any local hardware store. (The same goes for electrical tape.)

Then, add in an easy-assembly wireless charging pad to ensure your phone and other accessories don’t add any clutter, either.

Step Four: Position the Computer Monitors

Now that your desk is set up, power is installed, and your cables are organized, it’s time to properly position your monitors. The optimal positioning for you is dependent on what you’re going to be using your computer for.

Gamers have different needs than finance workers, for example. Some professionals prefer to have two monitors that are dedicated to certain functions off to the side of their desks while the main monitor is centered.

People who play a lot of video games typically want an uninterrupted, panoramic view with absolutely no gaps between the screens. A lot of these options are simply up to personal preference. To create a more customizable setup, accessories like the Monitor Arm adjust on three axes and accommodate a single and dual monitor display.

There is one arrangement that isn’t generally ideal for anyone, and that is the stacked monitor style of setup where one screen is directly above another, reaching toward the ceiling. All of your monitors should be in your level line of sight, and you shouldn’t have to crane your neck to look at something.

Step Five: Configure Your Display Settings

This particular step depends on your operating system: Mac or PC. If you’re using a MacBook, you’ll need a connection hub with multiple USB-C and HDMI ports. This also goes for PC laptops if it doesn’t come with enough ports built in.

Many PC towers and Macs have enough ports installed on them but be sure to check your towers for the right number of HDMI ports. Running more than two displays has proven to be problematic for some of Apple’s M1 line of products, like the M1 MacBook Pros.

Some people may want to use their MacBooks docked and in clamshell mode while using an external display, but some models only allow for a single external monitor at a time. Newer models also allow for thunderbolt ports for external monitor connections.

When configuring your monitors, check to be sure that they are all set to the same resolution to allow for the best compatibility and user experience. You may have to adjust where the monitors are virtually — your computer might think one monitor is on your left while it’s actually physically on the right.

Step Six: Test Your Monitors Out

Now, for the fun part: Trying your new setup! This is pretty straightforward and shouldn’t take more than a few minutes. For most of us who work office jobs or casually consume content, color accuracy and brightness aren’t too much of a concern.

However, if you’re a gamer or a graphic designer, these things are pretty critical. Load up a game and simply play it. Any color balance or brightness differences should be fairly obvious within seconds. Try to play games that feature both bright and dark environments for the best testing.

Certain models of monitors may require you to change the settings with the physical controls underneath or behind the actual screen itself. All brightness and color settings should be set to the same presets.

You can occasionally get multiple monitors of the exact same model and set to the same settings and still show a visual difference. In these cases, you may want to return the monitor or simply adjust the settings on that particular screen until it visually matches the others.

How Do You Make the Most of a Multi-Monitor Display?

Wondering why you need multiple monitors? Perhaps to some, it can seem a little overkill, but it can make a huge difference in your comfort and productivity.

Work From an Ergonomic Office Chair

Low-quality chairs can contribute to back and neck pain. To keep your work life as healthy as possible, always invest in chairs with ergonomic features like lumbar support and armrests.

Quality desk chairs, like the Ergonomic Chair, can transform your work day or gaming session. Take frequent breaks from sitting, even if you have a high-quality chair. Sitting for extended periods of time is generally not great for you. This is where standing desks really shine. Get up every so often and stand at your desk for a while.

While sitting, your monitors should be facing you head-on and level to your eye-line. Adjust the level of your monitors accordingly. You should not adjust your chair to get to a proper level. Your chair should adjust to your specific height and ergonomic needs — not the other way around.

Avoid slouching while sitting and standing as much as possible. You shouldn’t have to reach far for your mouse or keyboard. Keep those two nice and close for optimal comfort.

branch verve chair

Keep Your Desk Neat and Organized

A cluttered desk can severely impact your productivity and focus. Having an organized desk with minimal peripherals is key. Seeing empty space on your desk can make it tempting to fill it up with stuff, but the extras will only distract you.

Having a bunch of stuff on your desk can also make it more difficult and time-consuming to clean. If you absolutely have to have certain things within reach, but you don’t want to crowd the top of your desk, invest in a Small Filing Cabinet.

This will maintain your desk's clean look and organization. Your desk is your workspace, not your storage space. If you plan on using a laptop as one of your monitors while using the keyboard, it might be a bright idea to invest in a folding stand.

Folding keyboard stands are inexpensive and will save your wrists from pain in the future. They also elevate your laptop’s screen for a more ergonomic viewing angle. Another excellent feature they have is that they easily fold away relatively flat.

Try a Standing Multi-Monitor Desk

A standing desk and multi-monitor setup is pretty much the ultimate productivity combination.

Having three monitors tethered allows for so much more room to breathe, and you’ll wonder how you got anything done with only one monitor before. With a standing desk, it feels more like a command center than just a workspace.

If you were ever concerned about sitting too much while gaming, the sitting/standing desk-and-multiple-monitor-setup combo is for you. No longer will you have to sit while playing video games or interviewing for a job.

If you’re not into gaming and just need to get work done, having all that screen real estate can save time and help you focus. Rather than switching back and forth to that spreadsheet you constantly need to reference, just have it constantly up on one of the screens.

Elevate Your Workspace — and Your Productivity

Most of us will spend 40 hours per week or more at a desk — and that’s only work. That isn’t even accounting for all the hours per week that we work on other projects or play games. Working at home has highlighted the pitfalls of many of our home offices.

By setting up extra monitors and a standing desk, you are unburdening your mind with the extra screen real estate and actively being healthier by standing more.


Sources:

The effectiveness of a chair intervention in the workplace to reduce musculoskeletal symptoms. A systematic review | PMC

Standing up for a healthier lifestyle | OSF HealthCare

Two Monitors, or Not Two Monitors: That Is the Question | Wirecutter

Save Energy in Your Household With A Smart Power Strip | Office of Energy Efficiency & Renewable Energy

Problems connecting an external monitor to your M1 Mac? Here's the fix! | iMore

On new furniture, exclusive sales and more.

Thank You!